The default grouping of messages makes your emails stay together like a notebook. But if you are looking for a mail of a specific date, searching for them in clusters can be quite exhausting. To solve this problem, Gmail allows ungrouping the conversations into single messages to meet your desires.
How do I stop Gmail from grouping my Emails?
As Gmail’s algorithm has set its default functioning to group the emails when you Gmail for the first time your incoming as well as sent emails are always grouped together. You can easily ungroup the emails by using the Conversation view option. When you use this option, all of your mails will be separately listed. If you ever want to group the emails together again, you can use Conversation View On option. To learn more about how you can ungroup emails in Gmail read the steps below.
How to Ungroup Emails in Gmail?
Ungrouping emails in Gmail is an easy procedure and requires only a few steps to follow. Once you ungroup emails, you cannot view all of the previous conversations with the same person at once. You will have to open and check all of them to read it. You can ungroup emails in Gmail by using either phones or your desktop/PCs. To ungroup emails in Gmail:
- Using Phones
- Using Desktop/PC
1. Using Phones (Android, IOs)
The steps to follow to ungroup emails in Gmail is the same for Android as well as IOs devices. To do so:
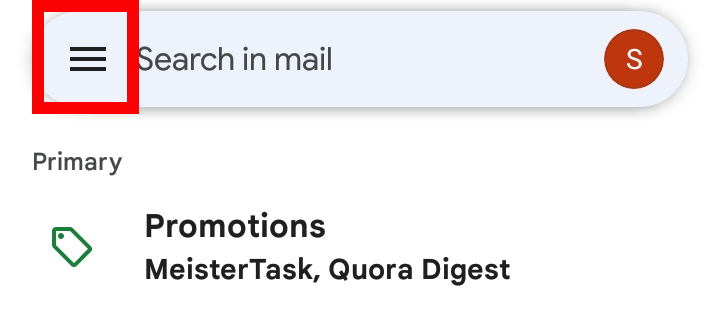
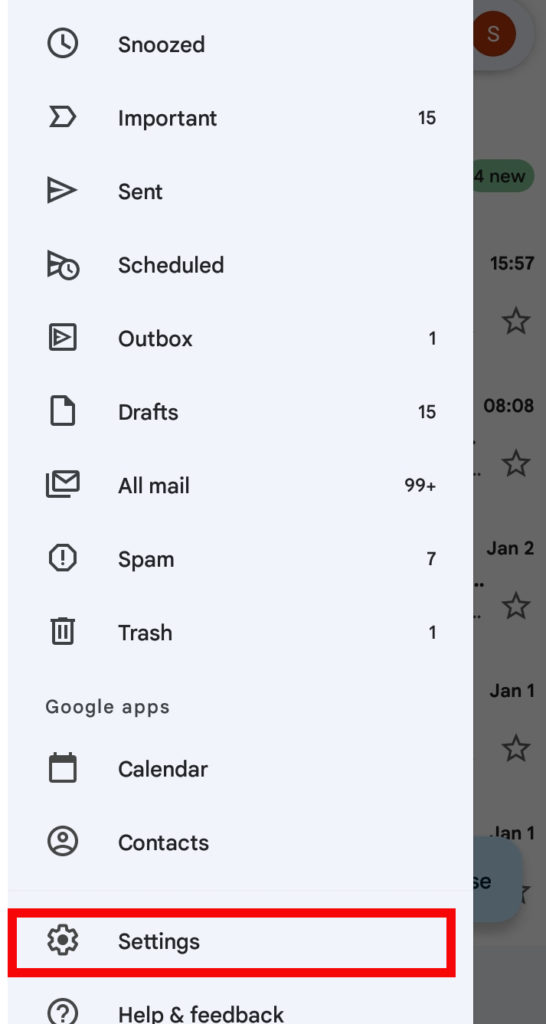
1. Open Gmail and select the ‘Hamburger icon‘.
2. Go to ‘Setting‘ and tap the account whose conversation you want to ungroup.
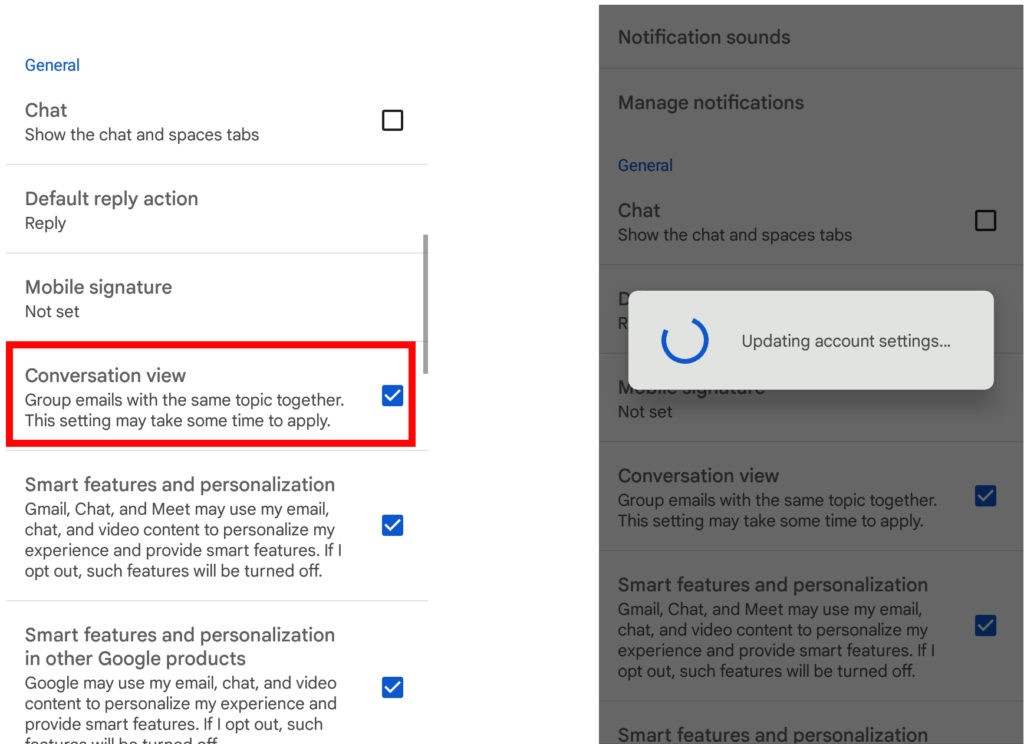
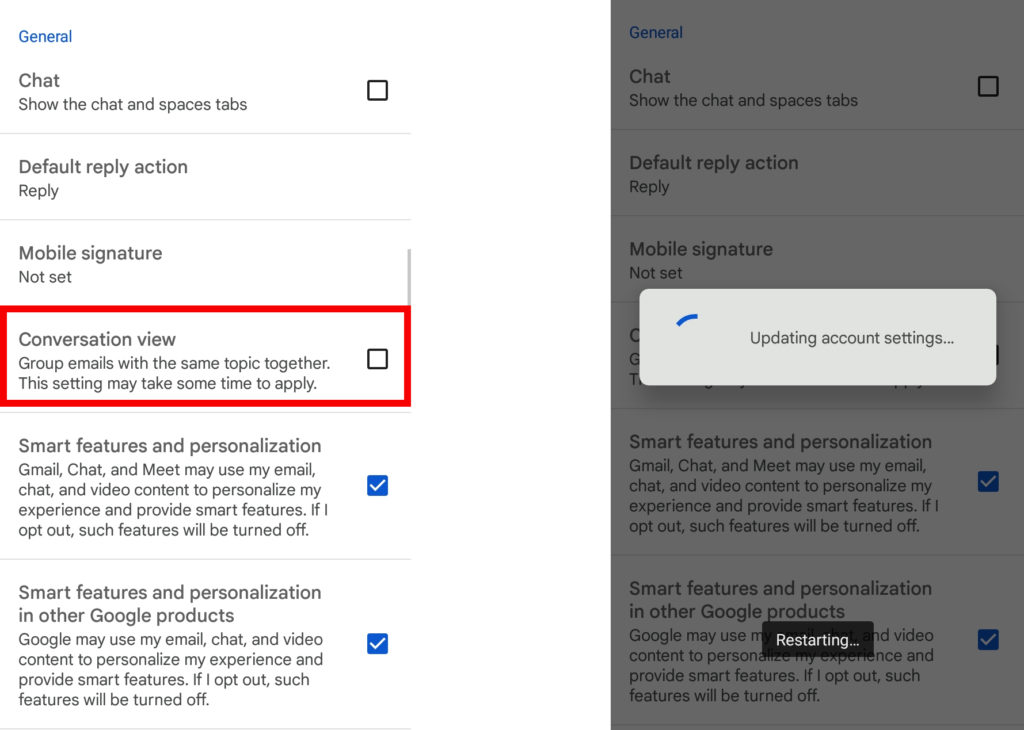
3. Scroll down to ‘Conversation View’ option and remove the tick mark by clicking on it.
Once you do this, the account settings get updated and then all the conversations in your inbox get ungrouped.
2. Using Desktop/PC
To ungroup emails in Gmail using your computer:
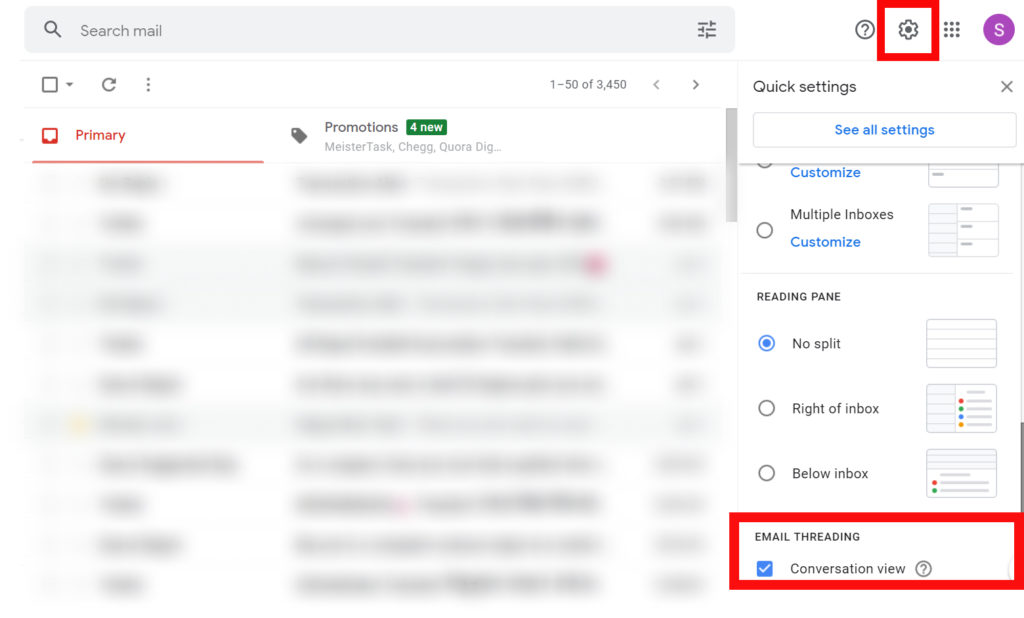
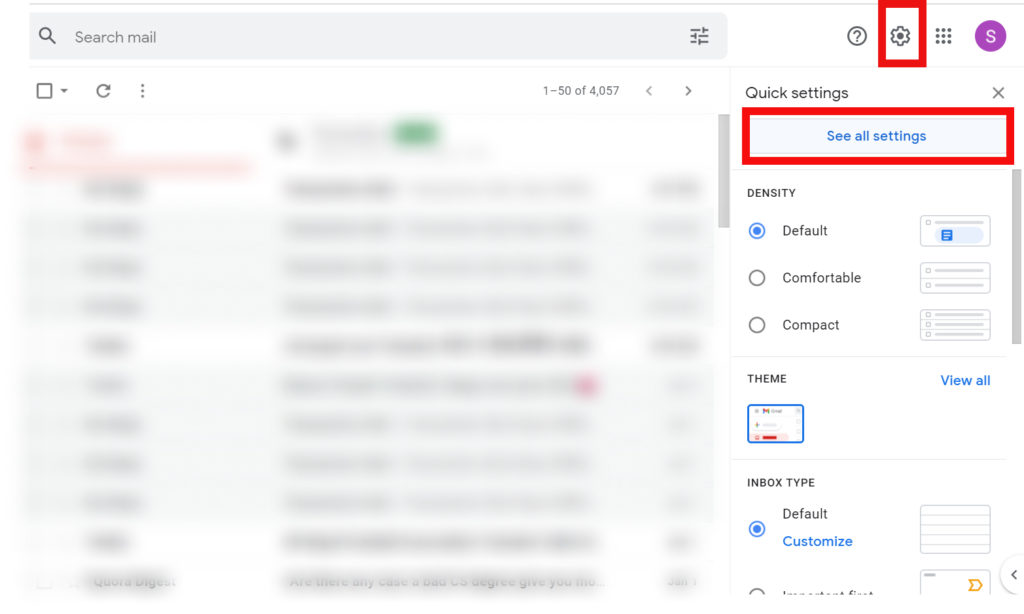
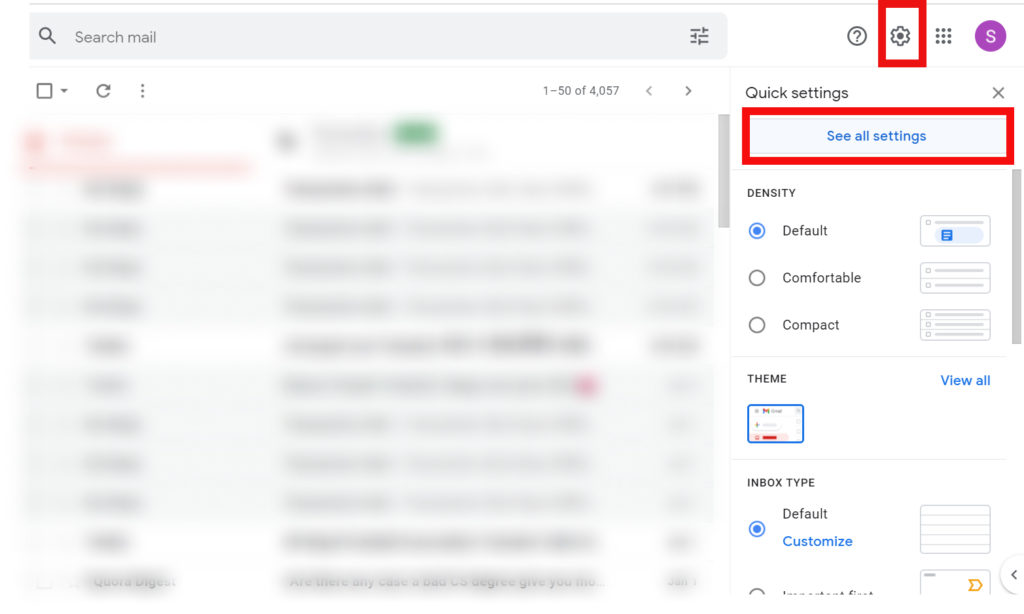
1. Open Gmail on browser and click on ‘Settings’.
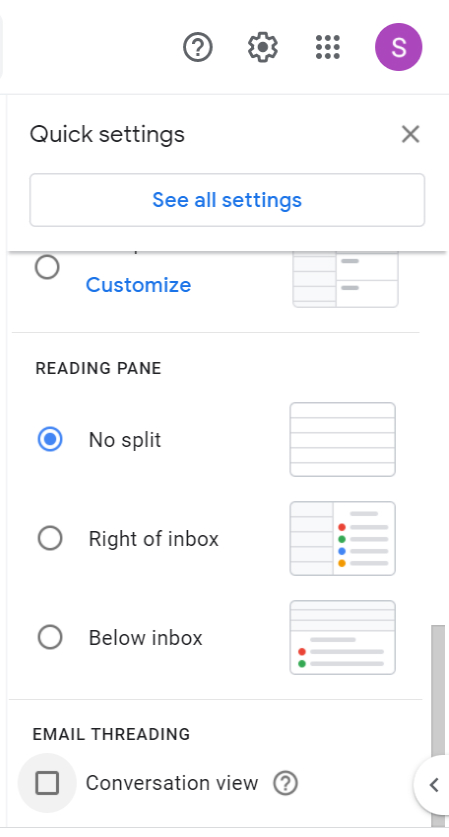
2. Scroll down the quick settings to ‘Conversation View’.
3. Remove the ‘tick mark’ by clicking on it.
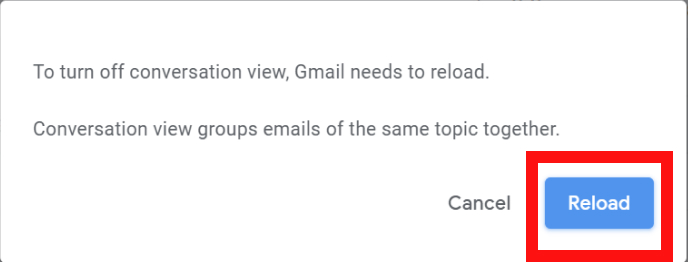
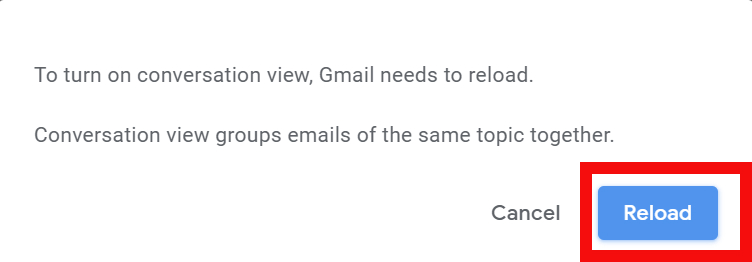
4. Tap on ‘Reload’.
OR
1. Click on ‘Settings’.
2. Select ‘See all Settings’.
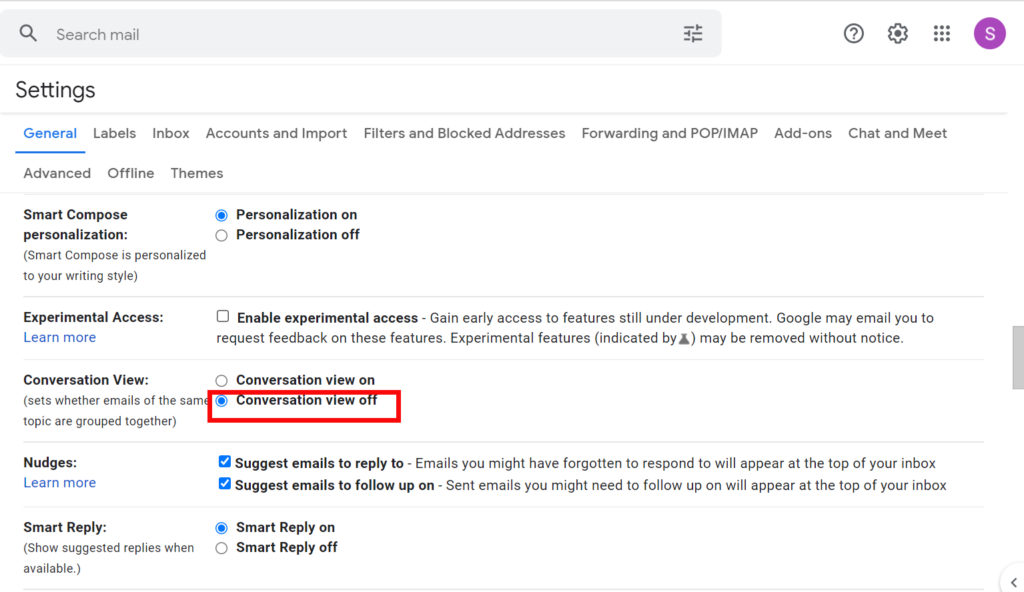
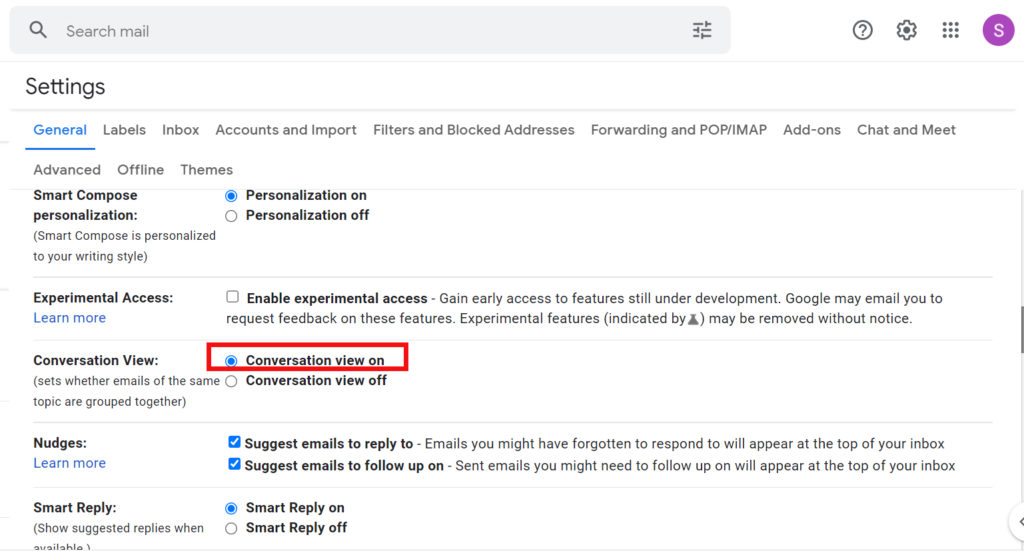
3. Scroll down to ‘Conversation View’ option and click on ‘Conversation View off’.
This way, you can easily ungroup emails in Gmail using your computers.
How to Group Emails in Gmail?
In Gmail, the emails someone sends to you is grouped by default. The grouping of emails allows you easy and fast access to all that person’s mail history with you. The emails will be clustered here like text messages. You can ungroup them by using the steps given above. But, if you want to group them back again, you will have to alter some of your settings. You can easily group emails in Gmail using your electronic devices by using the steps mentioned below:
1. Using Phones (Android, IOs)
To group emails using phones:
1. Gmail and select the ‘Hamburger icon‘.
2. Go to ‘Setting‘ and tap the account whose conversation you want to group.
3. Scroll down to ‘Conversation View’ option and click on the small box.
The account settings get updated and your emails get grouped again.
2. Using Desktop/PC
To group emails in Gmail using your computer:
1. Open Gmail on browser and click on ‘Settings’.
2. Scroll down the quick settings to ‘Conversation View’.
3. Click on the small box.
4. Tap on ‘Reload‘.
OR
1. Click on ‘Settings’.
2. Select ‘See all Settings’.
3. Scroll down to ‘Conversation View’ option and click on ‘Conversation View On’.
This way, you can easily group emails in Gmail using your computers.
Conclusion
Thus, in this manner, you can ungroup emails in Gmail and group them back again according to your preference. It is much easier when the mails are grouped together because they are clustered like text messages from new to old and scanning them becomes so much more effective that way. Ungrouping emails makes it clearer and looks more professional and you do not get confused about which one came when. Also Read: How to Insert a Table in Gmail? Subscribe to our newsletter for the latest tech news, tips & tricks, and tech reviews.
Δ


