“Channels” is where a topic-based, organized text conversation happens. This is why a Discord channel can get crowded with too many messages. For channels that are created to only distribute information, it needs to be made read-only, otherwise, text messages left afterward will collide with the information. That is why we are here today to tell you how to make a Discord Channel Read Only. Making a Discord Channel read-only allows important information to be seen and for the channel to stay organized, minus the cluttered messages.
Why do we need a read-only Discord channel?
Because it helps the members in the channel to view and review the content of the channel without overlapping the given information. That is why, usually channels like Rules and Announcements are made read-only, so any newcomer or an oldcomer too could go through the information.
How to Make a Discord Channel Read Only?
To make a Discord channel read-only, you need to be the admin of the server. Or you could be one of the admins if you have multiple admins on the server. Then you can proceed to edit the settings on the app via phone or a desktop.
On Desktop
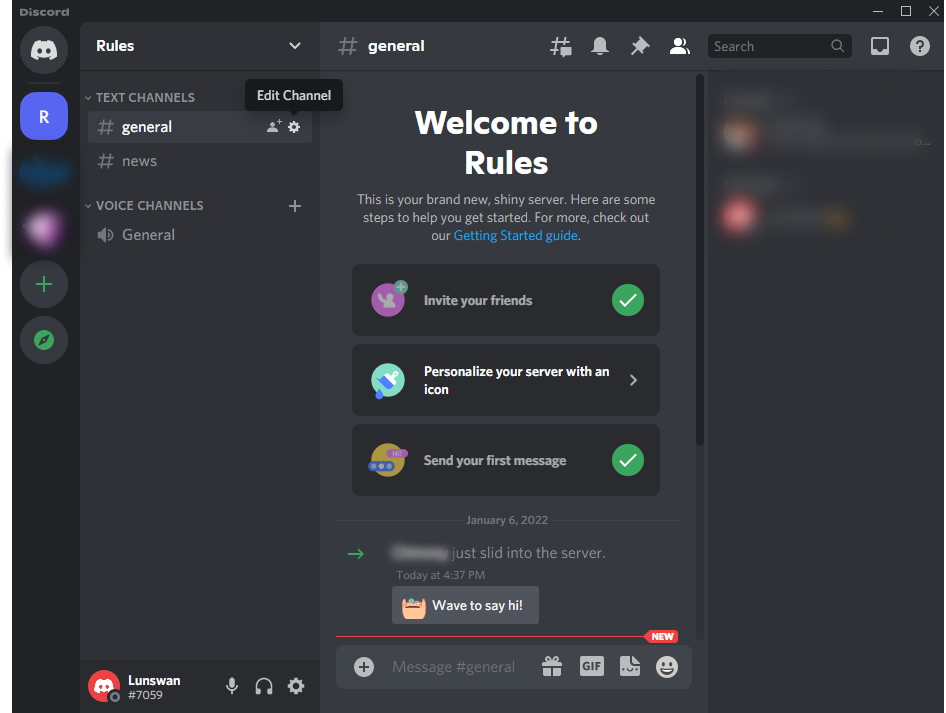
1. Go to the server and click the gear beside the channel you want to make read-only.
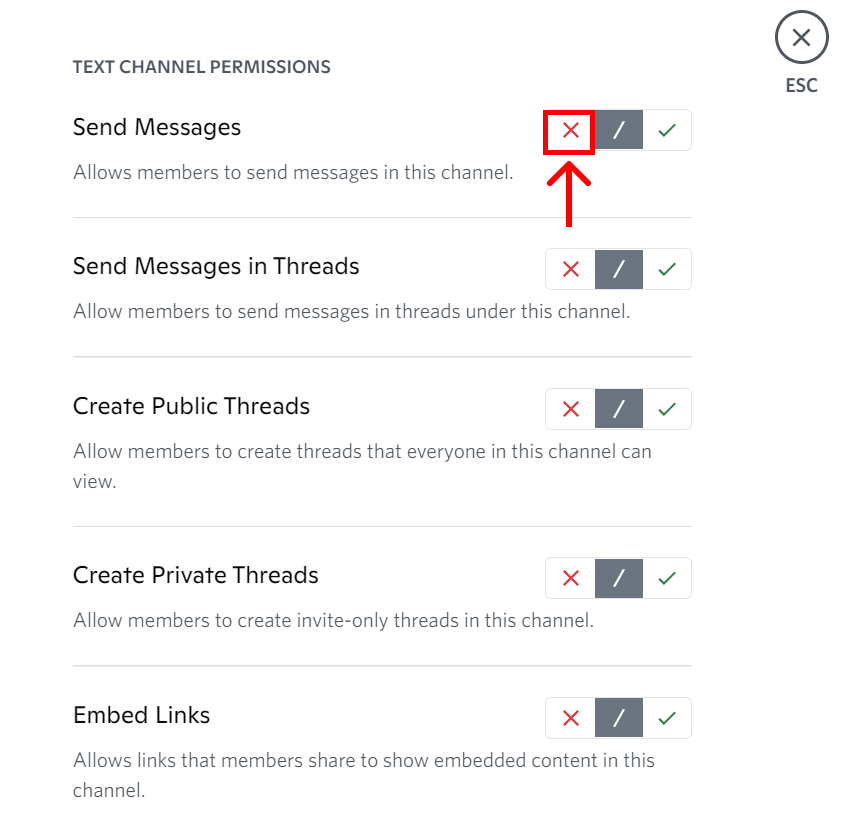
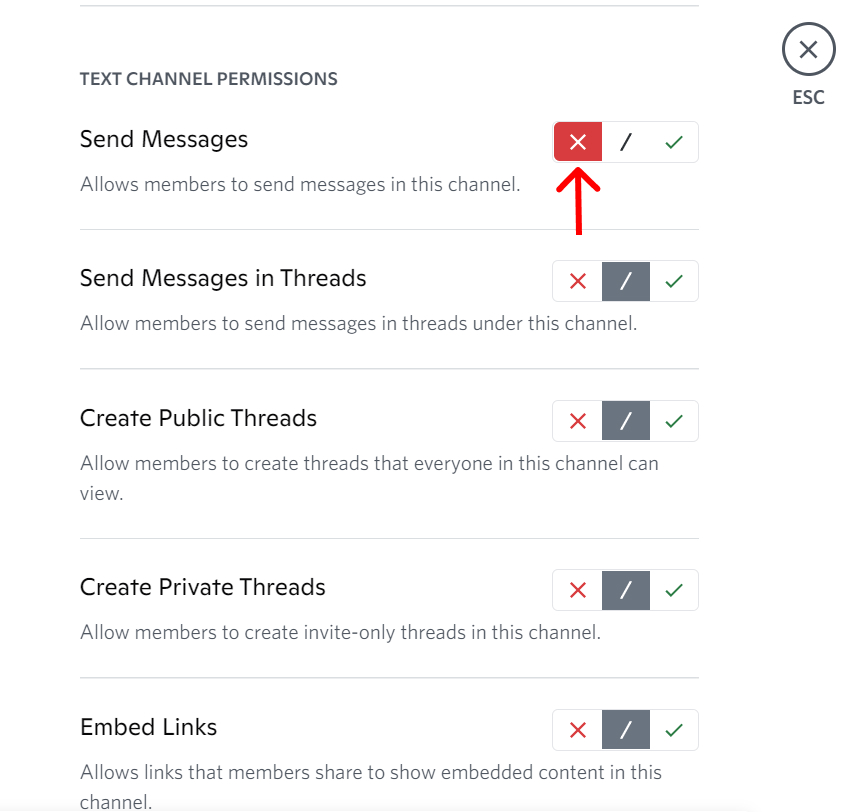
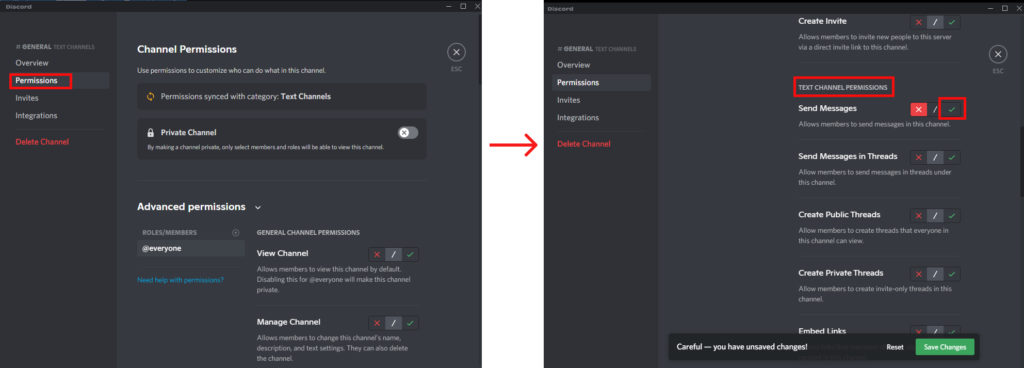
2. Click Permissions and find TEXT CHANNEL PERMISSIONS to click the red X sign on Send Messages.
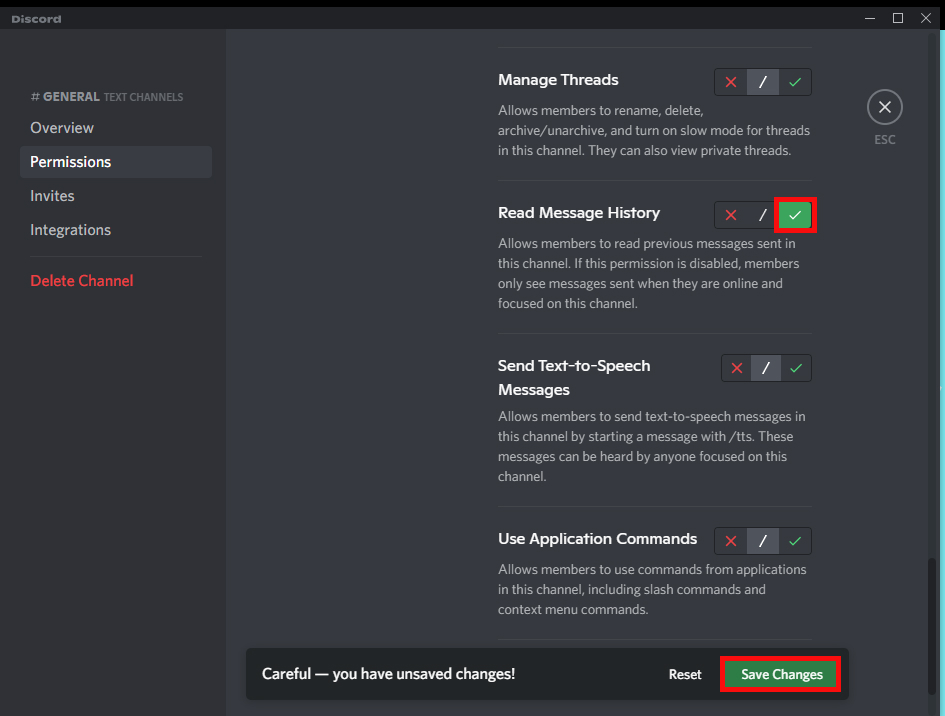
3. Also, click on the green tick mark on “Read Message History”.
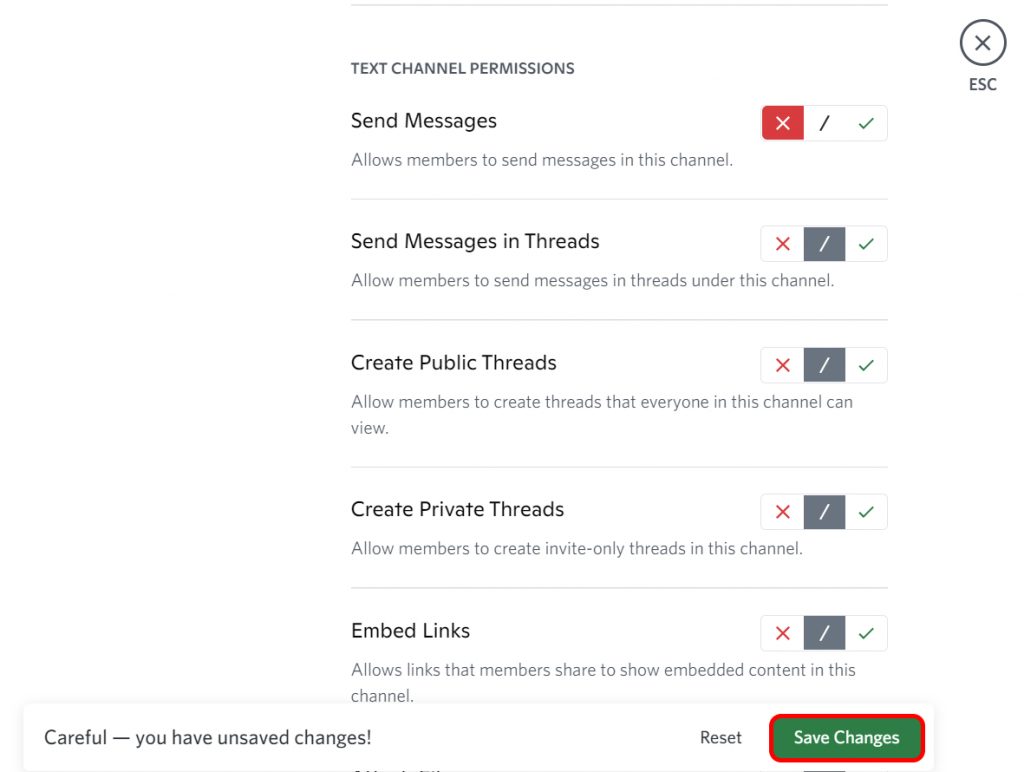
4. Click on the green Save Changes dialogue box.
On Phone:
1. Go to the server and click the gear beside the channel you want to make read-only.
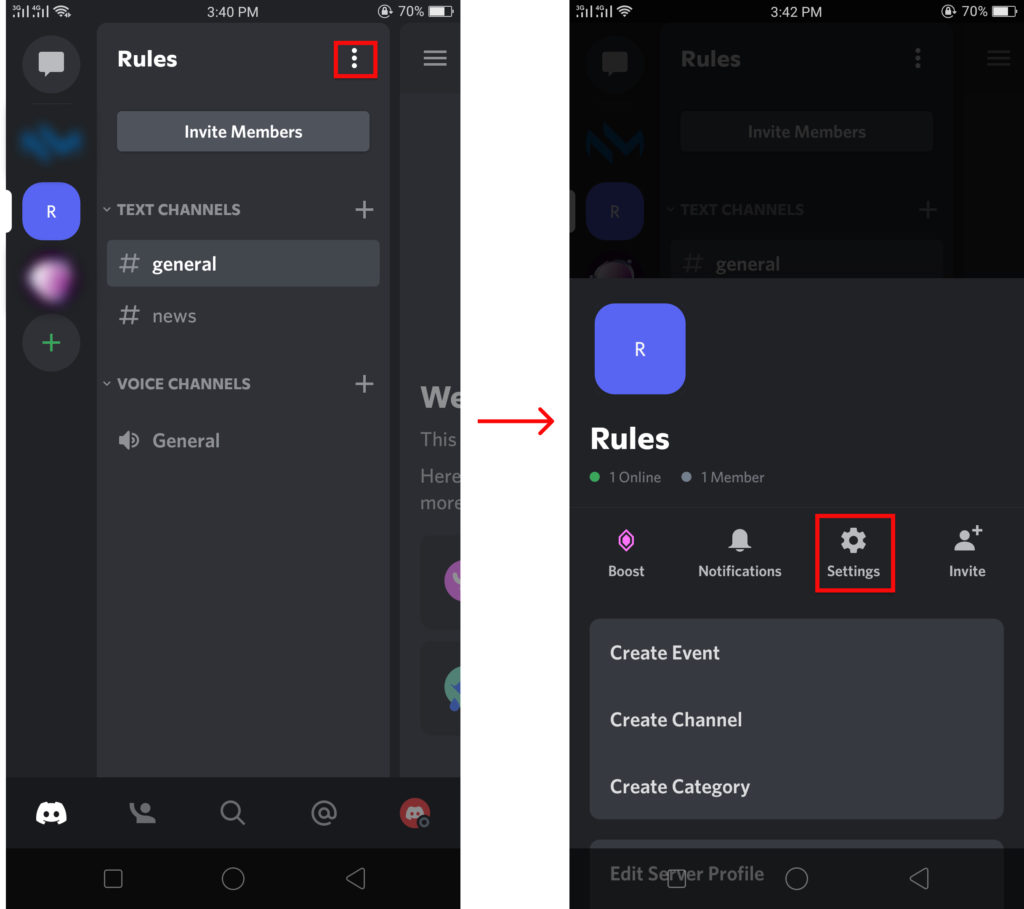
2. Click on the three dots besides Rules and click Settings.
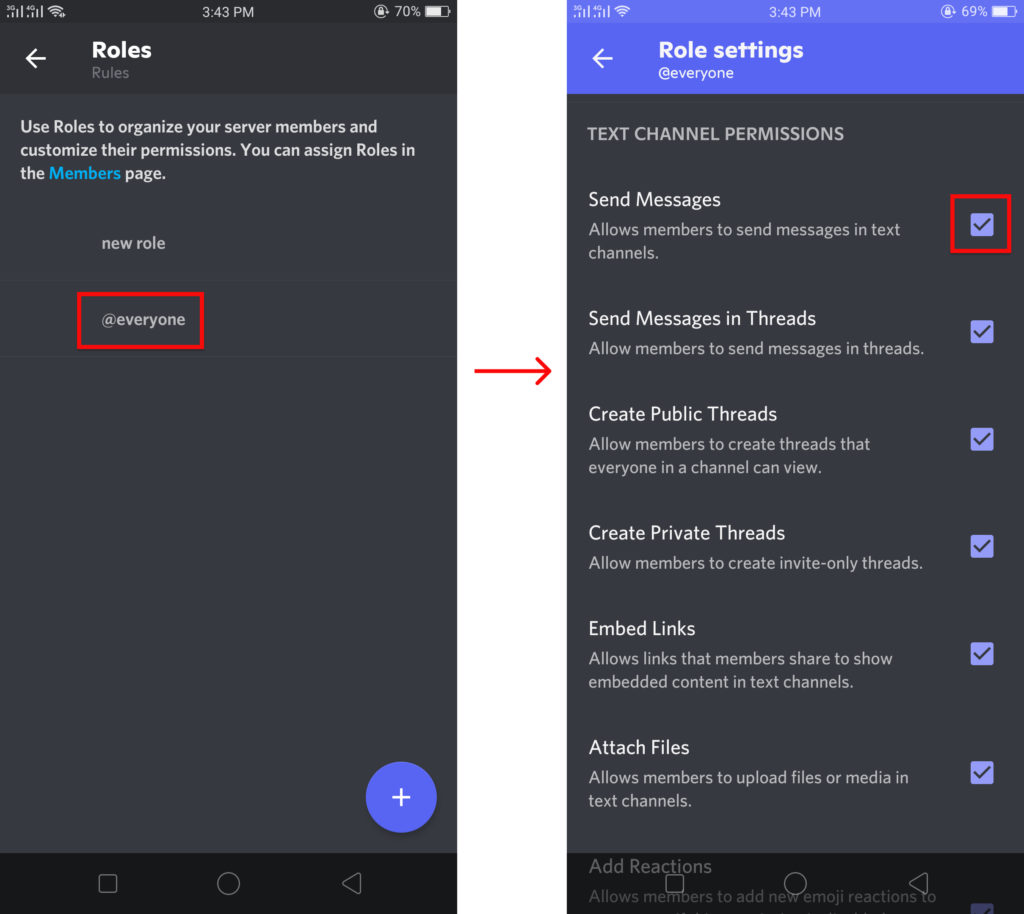
3. Find Roles under USER MANAGEMENT.
4. Go to @everyone and scroll to find TEXT CHANNEL PERMISSIONS.
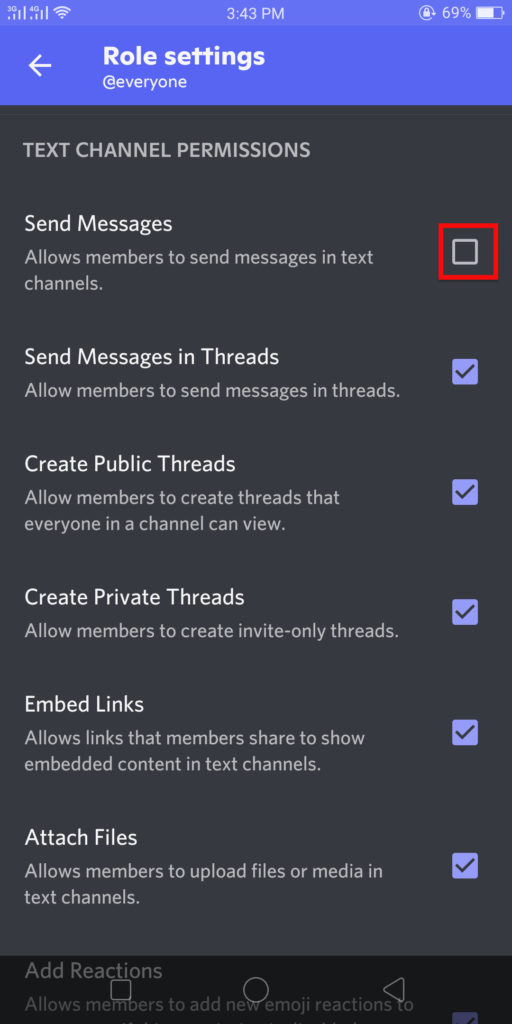
5. Tick off the box next to Send Messages.
7. Also, check to see if the “Read Message History” box is ticked on.
The reason why we tick the box of “Read Message History” is to be able to see the important messages in the channel before we were added to the group. This setting needs to be enabled so you can go through the messages of the channel when you weren’t online.
What if I have to add a moderator in the read-only channel?
This is also possible. Having at least one more member who could relay messages can be helpful when the admin is in a time crunch. What needs to be done in such a condition is: The admin of the server will right-click the Server name and go to Server Settings. Now not just the admin, but the moderator will also be able to send messages in the channel.
Conclusion
A discord channel is usually made read-only when the channel is about mentioning rules or announcements. Or, in other cases, it is to only deliver information without anyone else or select a few to send messages. So, knowing how to make a discord channel read-only helps to build your channel into a briefing area. We hope this article helped you. Let us know in the comments if what the name of your read-only Discord channels are, and what kind of information is relayed there. Also Read: How to Make a Rules Channel in Discord? Subscribe to our newsletter for the latest tech news, tips & tricks, and tech reviews.
Δ


title: “How To Make A Discord Channel Read Only " ShowToc: true date: “2022-12-25” author: “Lisa Davis”
Channels creation is one of the best ways to divide a group/server into compartments. Especially if you are running a huge group, business, or even academic classes, these channels help to organize the server into departments. Different channels can be used for multiple purposes and can even be set to read-only. If you are unaware of how to make a Discord channel read only, worry no more because, with this article, we have you covered.
How to Create Channel on Discord?
The first thing you must know before you wish to make a Discord channel read only is how to create a Discord channel. You might want to create a new channel, especially for a purpose on your server. To create a channel on Discord, follow the given steps:
Using Phones:
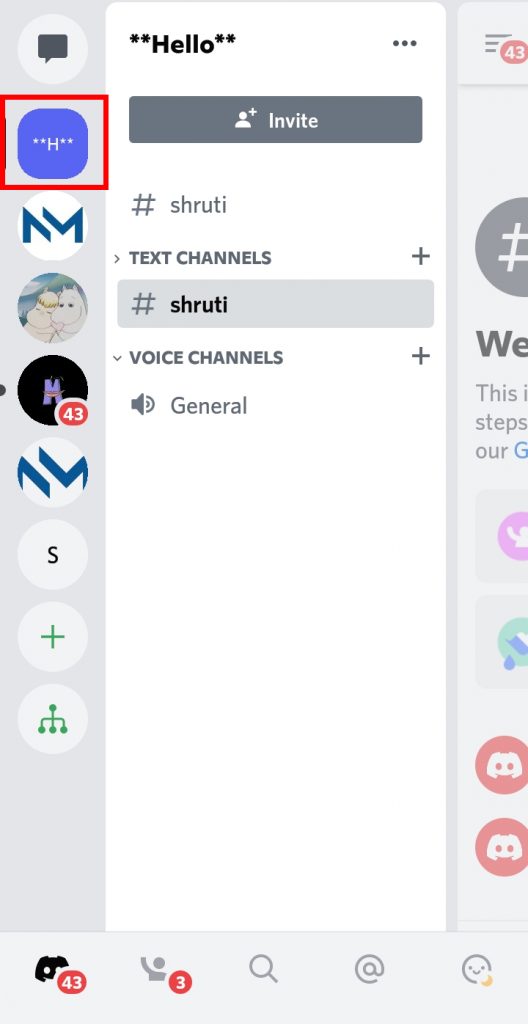
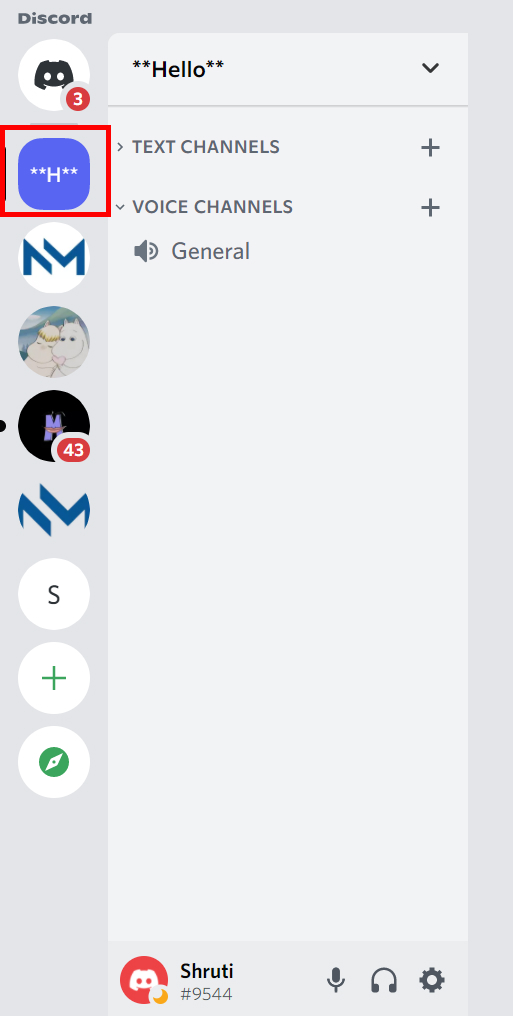
1. Open Discord and go to the server where you wish to create a channel.
2. Click on the server profile icon for some seconds.
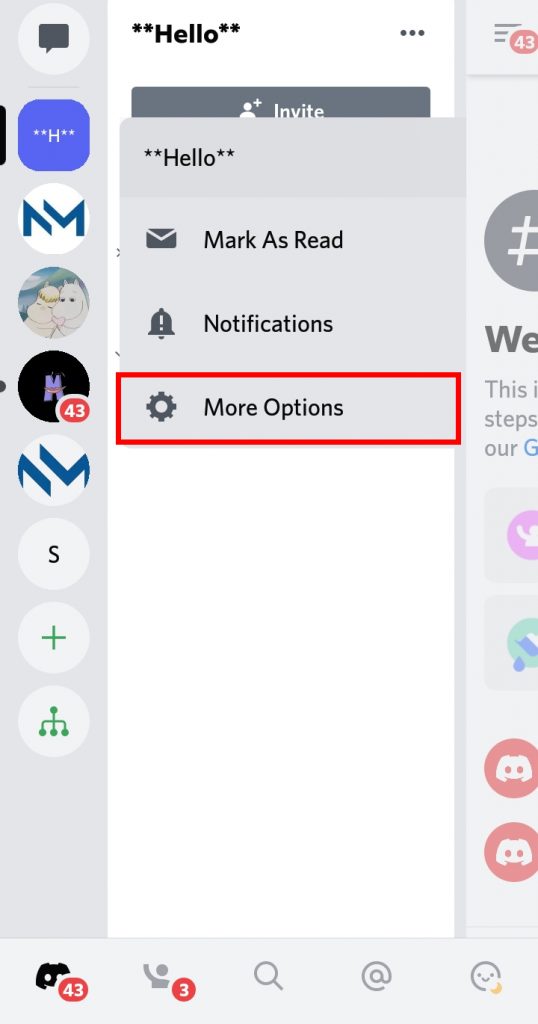
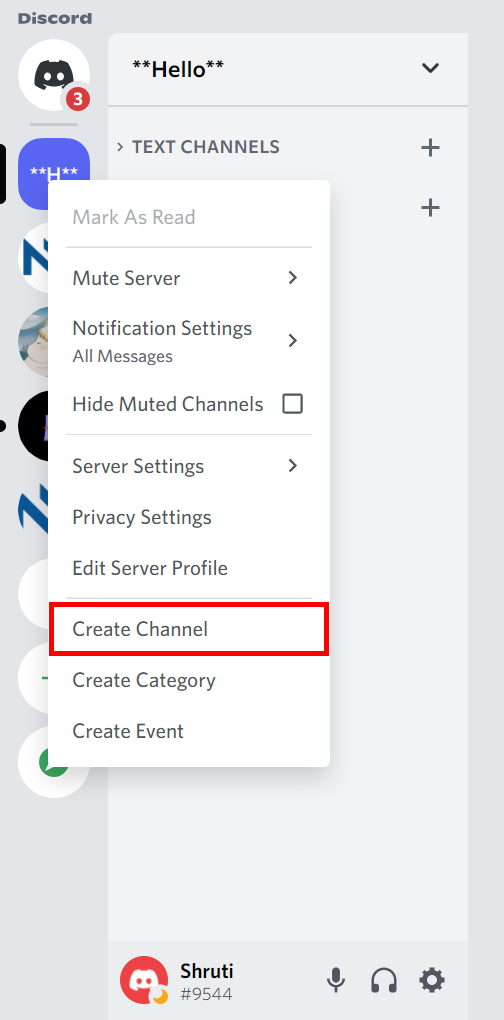
3. Click on ‘More options’.
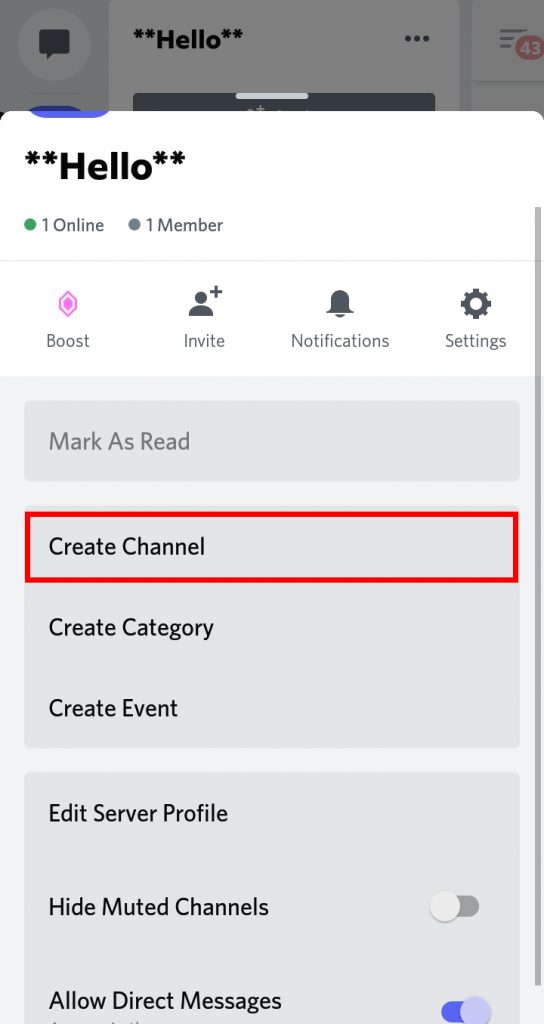
4. Select ‘Create Channel’ option.
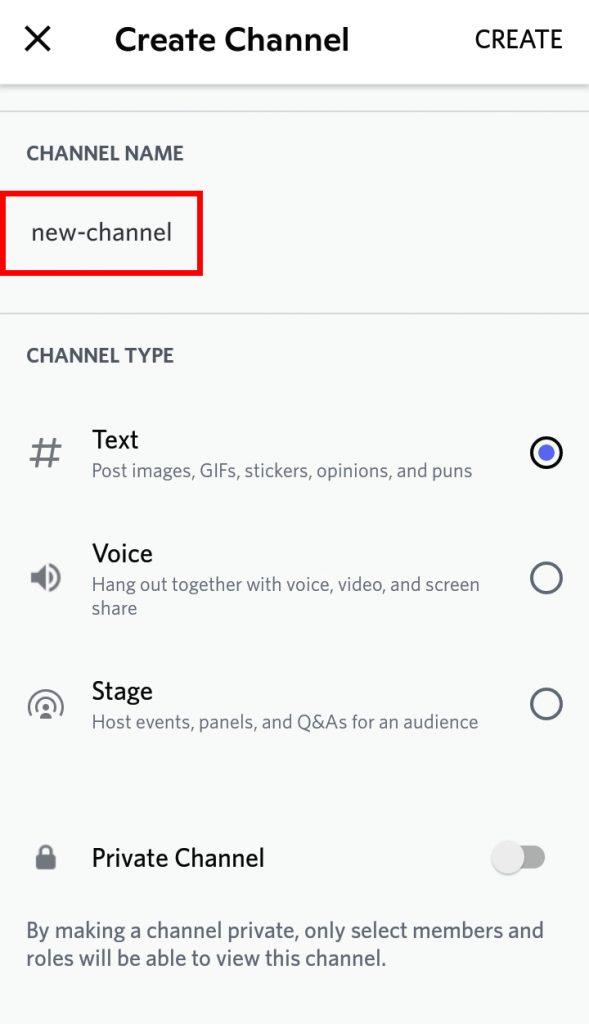
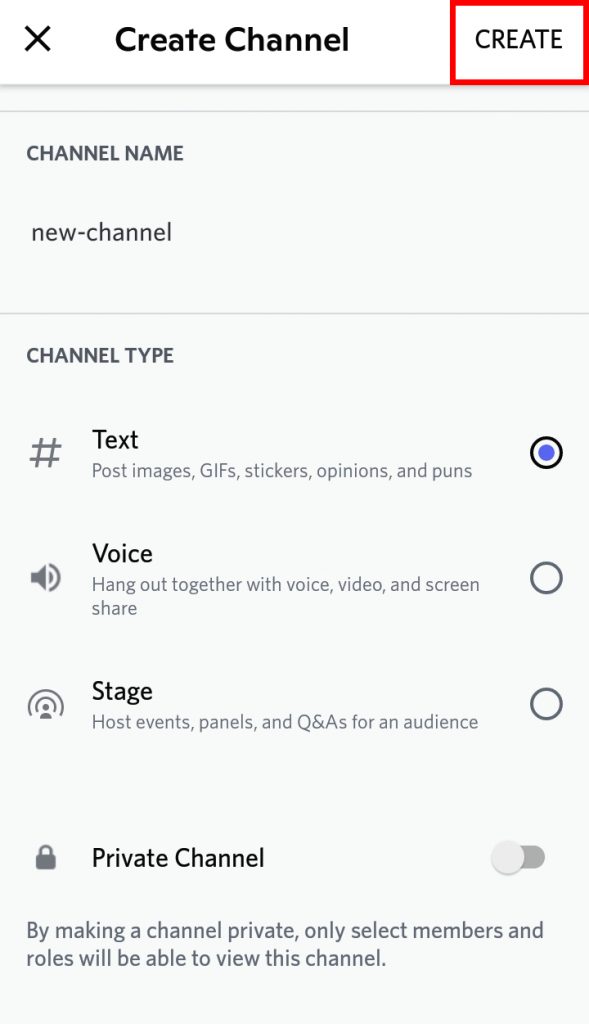
5. Enter a channel name you wish to create.
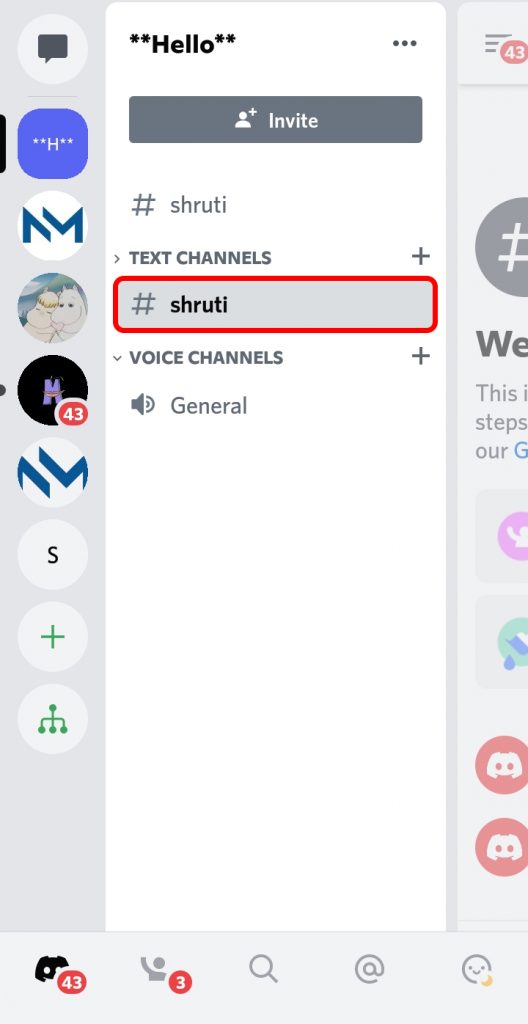
6. Click on ‘Create’.
The channel gets created.
Using Desktop/PC:
1. Open Discord and go to the server where you wish to create a channel.
2. Right-click on the server profile icon.
3. Select ‘Create Channel’ option.
4. Enter a channel name you wish to create.
5. Click on ‘Create Channel’.
The channel gets created.
How to Make a Discord Channel Read Only?
Now that you know how to create a channel on Discord, let us proceed to learn how you can set it to read only. When you set a channel to read only, the members on the server can only see and read the messaged sent on that particular channel. This is perfect to announce something, put on notice, and provide certain information to users. You can make a Discord channel read only by:
- Using Phones
- Using Desktop/PC
1. Using Phones
To make a Discord channel read only using your mobile phone, follow the given steps:
1. Open the Discord app and log into your accounts.
2. Go to the server where you wish to edit the channel.
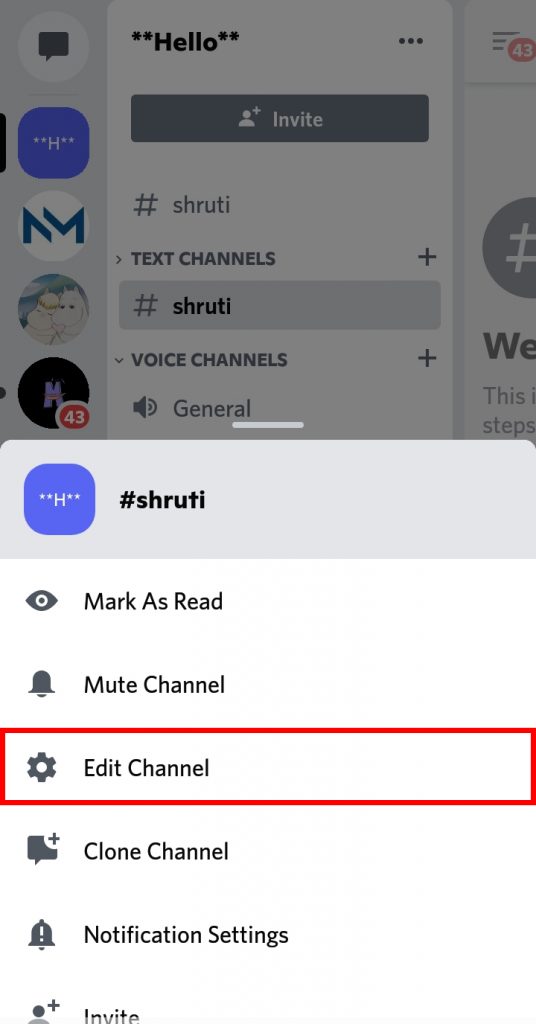
3. When you find the channel name, press on the one you wish to make read only for a few seconds.
4. Select the ‘Edit Channel’ option.
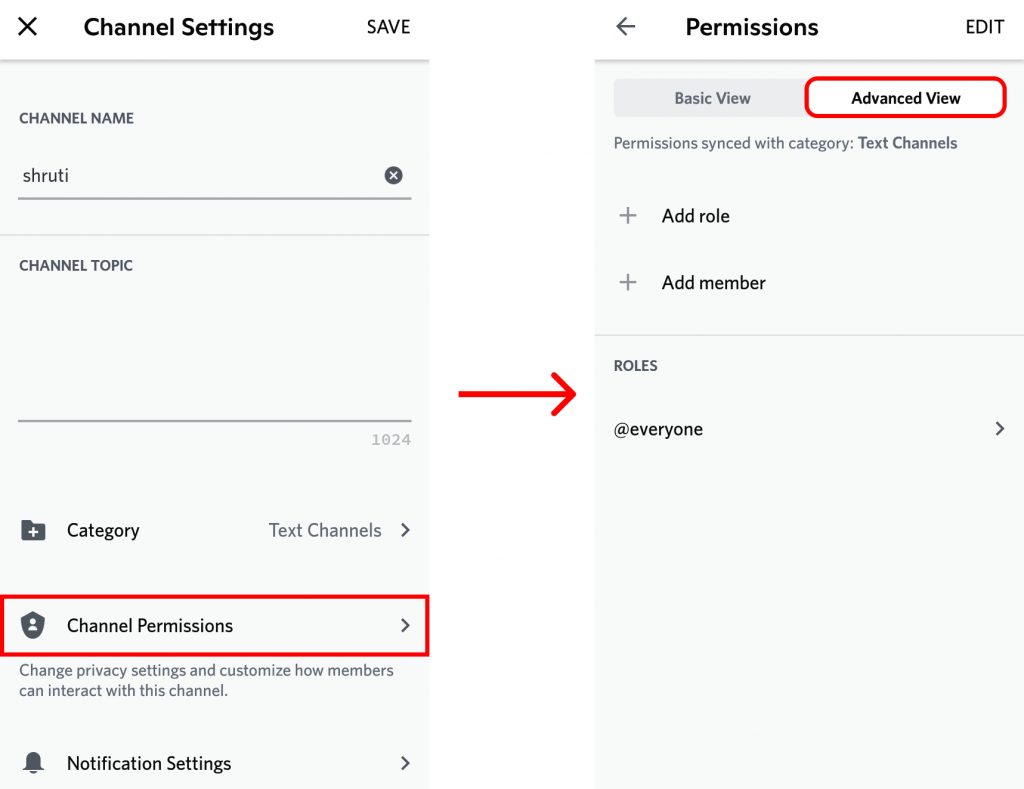
5. Click on ‘Channel Permissions’ then go to ‘Advanced View’.
6. Click on ‘Everyone’ below ‘Roles’.
7. Scroll down beside the ‘Send Message option’ and click on the ‘X’ sign.
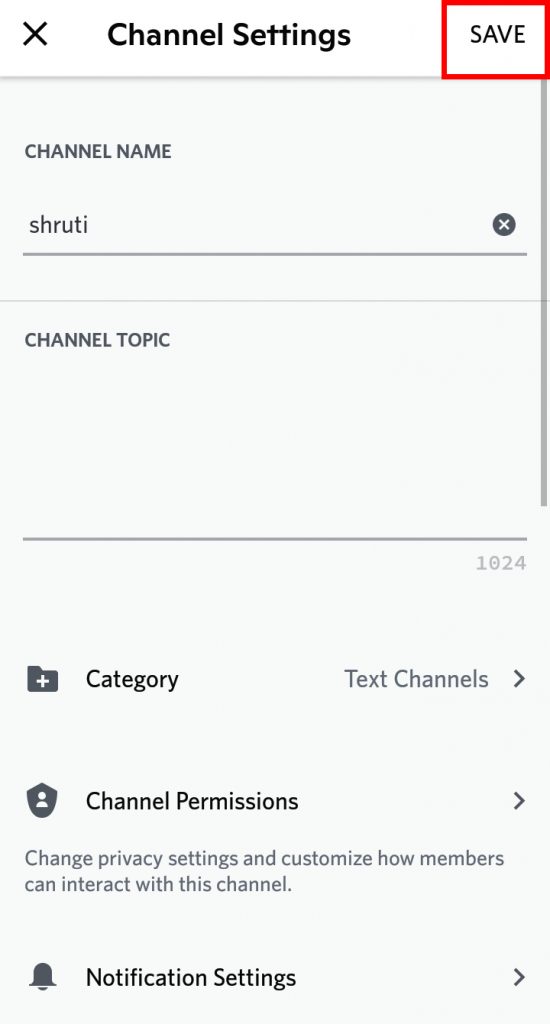
8. Click on ‘Save’.
Hence, in this way, you can make a Discord channel read only using your phones i.e. via the Discord phone app.
2. Using Desktop/PC
To make a Discord channel read only using your desktop/PC, follow the given steps:
1. Open the Discord app and log into your accounts.
2. Go to the server where you wish to edit the channel.
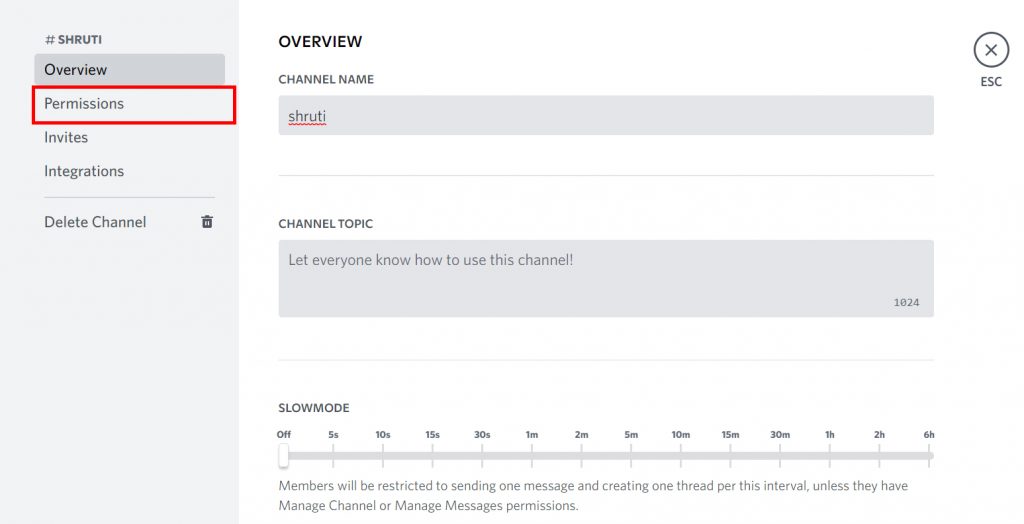
3. When you find the channel name, click on the ‘Gear icon’.
4. Select ‘Permissions’ option.
5. Scroll down beside ‘Send Message option’ and click on the ‘X’ sign.
6. The channel gets set to read only.
7. Click on ‘Save Changes’.
Hence, in this way, you can make a Discord channel read only using your phones i.e. via the Discord desktop app. Even when Discord channels are on read only mode, you ca still allow the admins and moderations to be able to send messages in the channel for announcement purposes. If you don’t know how to make someone admin on Discord, click here: How to Make Someone Admin on Discord?
How to make threads read-only?
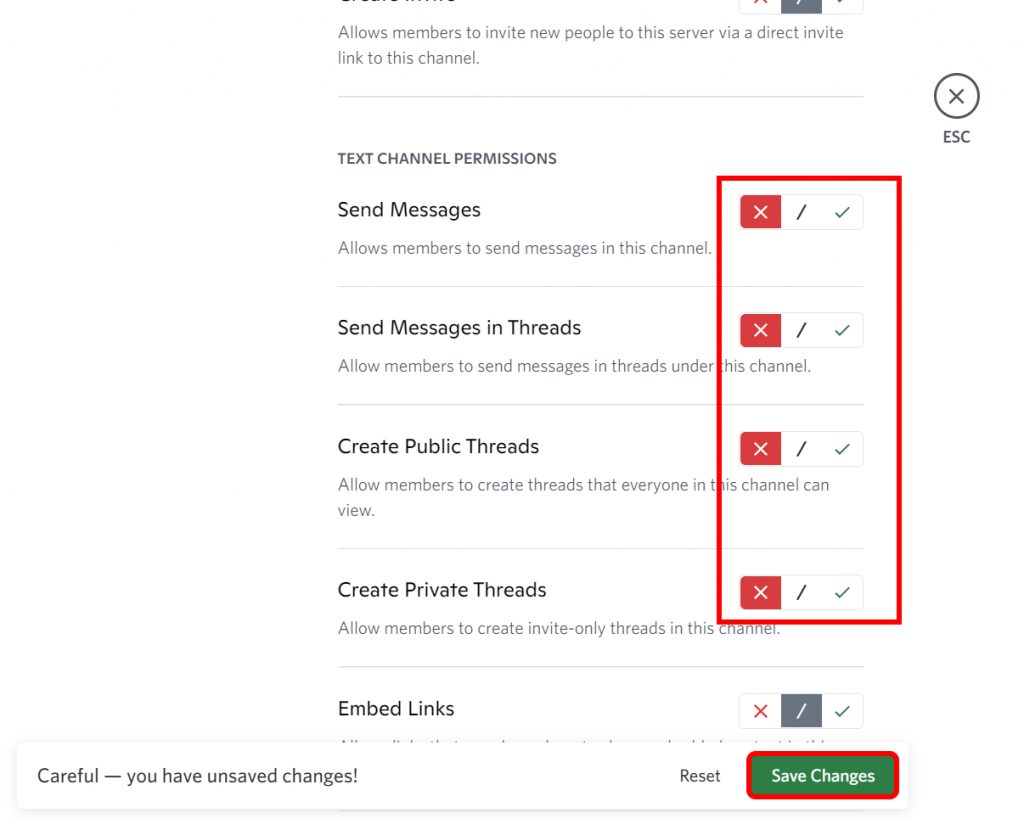
If you do not anyone to reply to the threads on Discord as well, first go to the channel permissions using the steps mentioned above, and along with disable the Send Message option, click on the ‘X’ icon beside Send Messages in Threads. If you wish to avoid threads entirely, also disable Create Public Threads and Create Private Threads as well.
Can I open read only channels for messages again?
Yes, you can. You can enable the message option anytime on Discord. To do so, follow the same steps you would for disabling them, and then, when you reach permissions, click on the ‘Tick mark’ icon beside the ‘Send Message’ option and hit ‘Save Changes’.
Conclusion
Hence, by using the steps mentioned above in the article, you can now easily make a Discord channel read only. You can also prevent threads from being created or just replied to and control the limit to which the members can interact on the server. I hope this article was helpful and cleared your doubts. Feel free to leave comments in case of any queries.
Δ